M3TAL
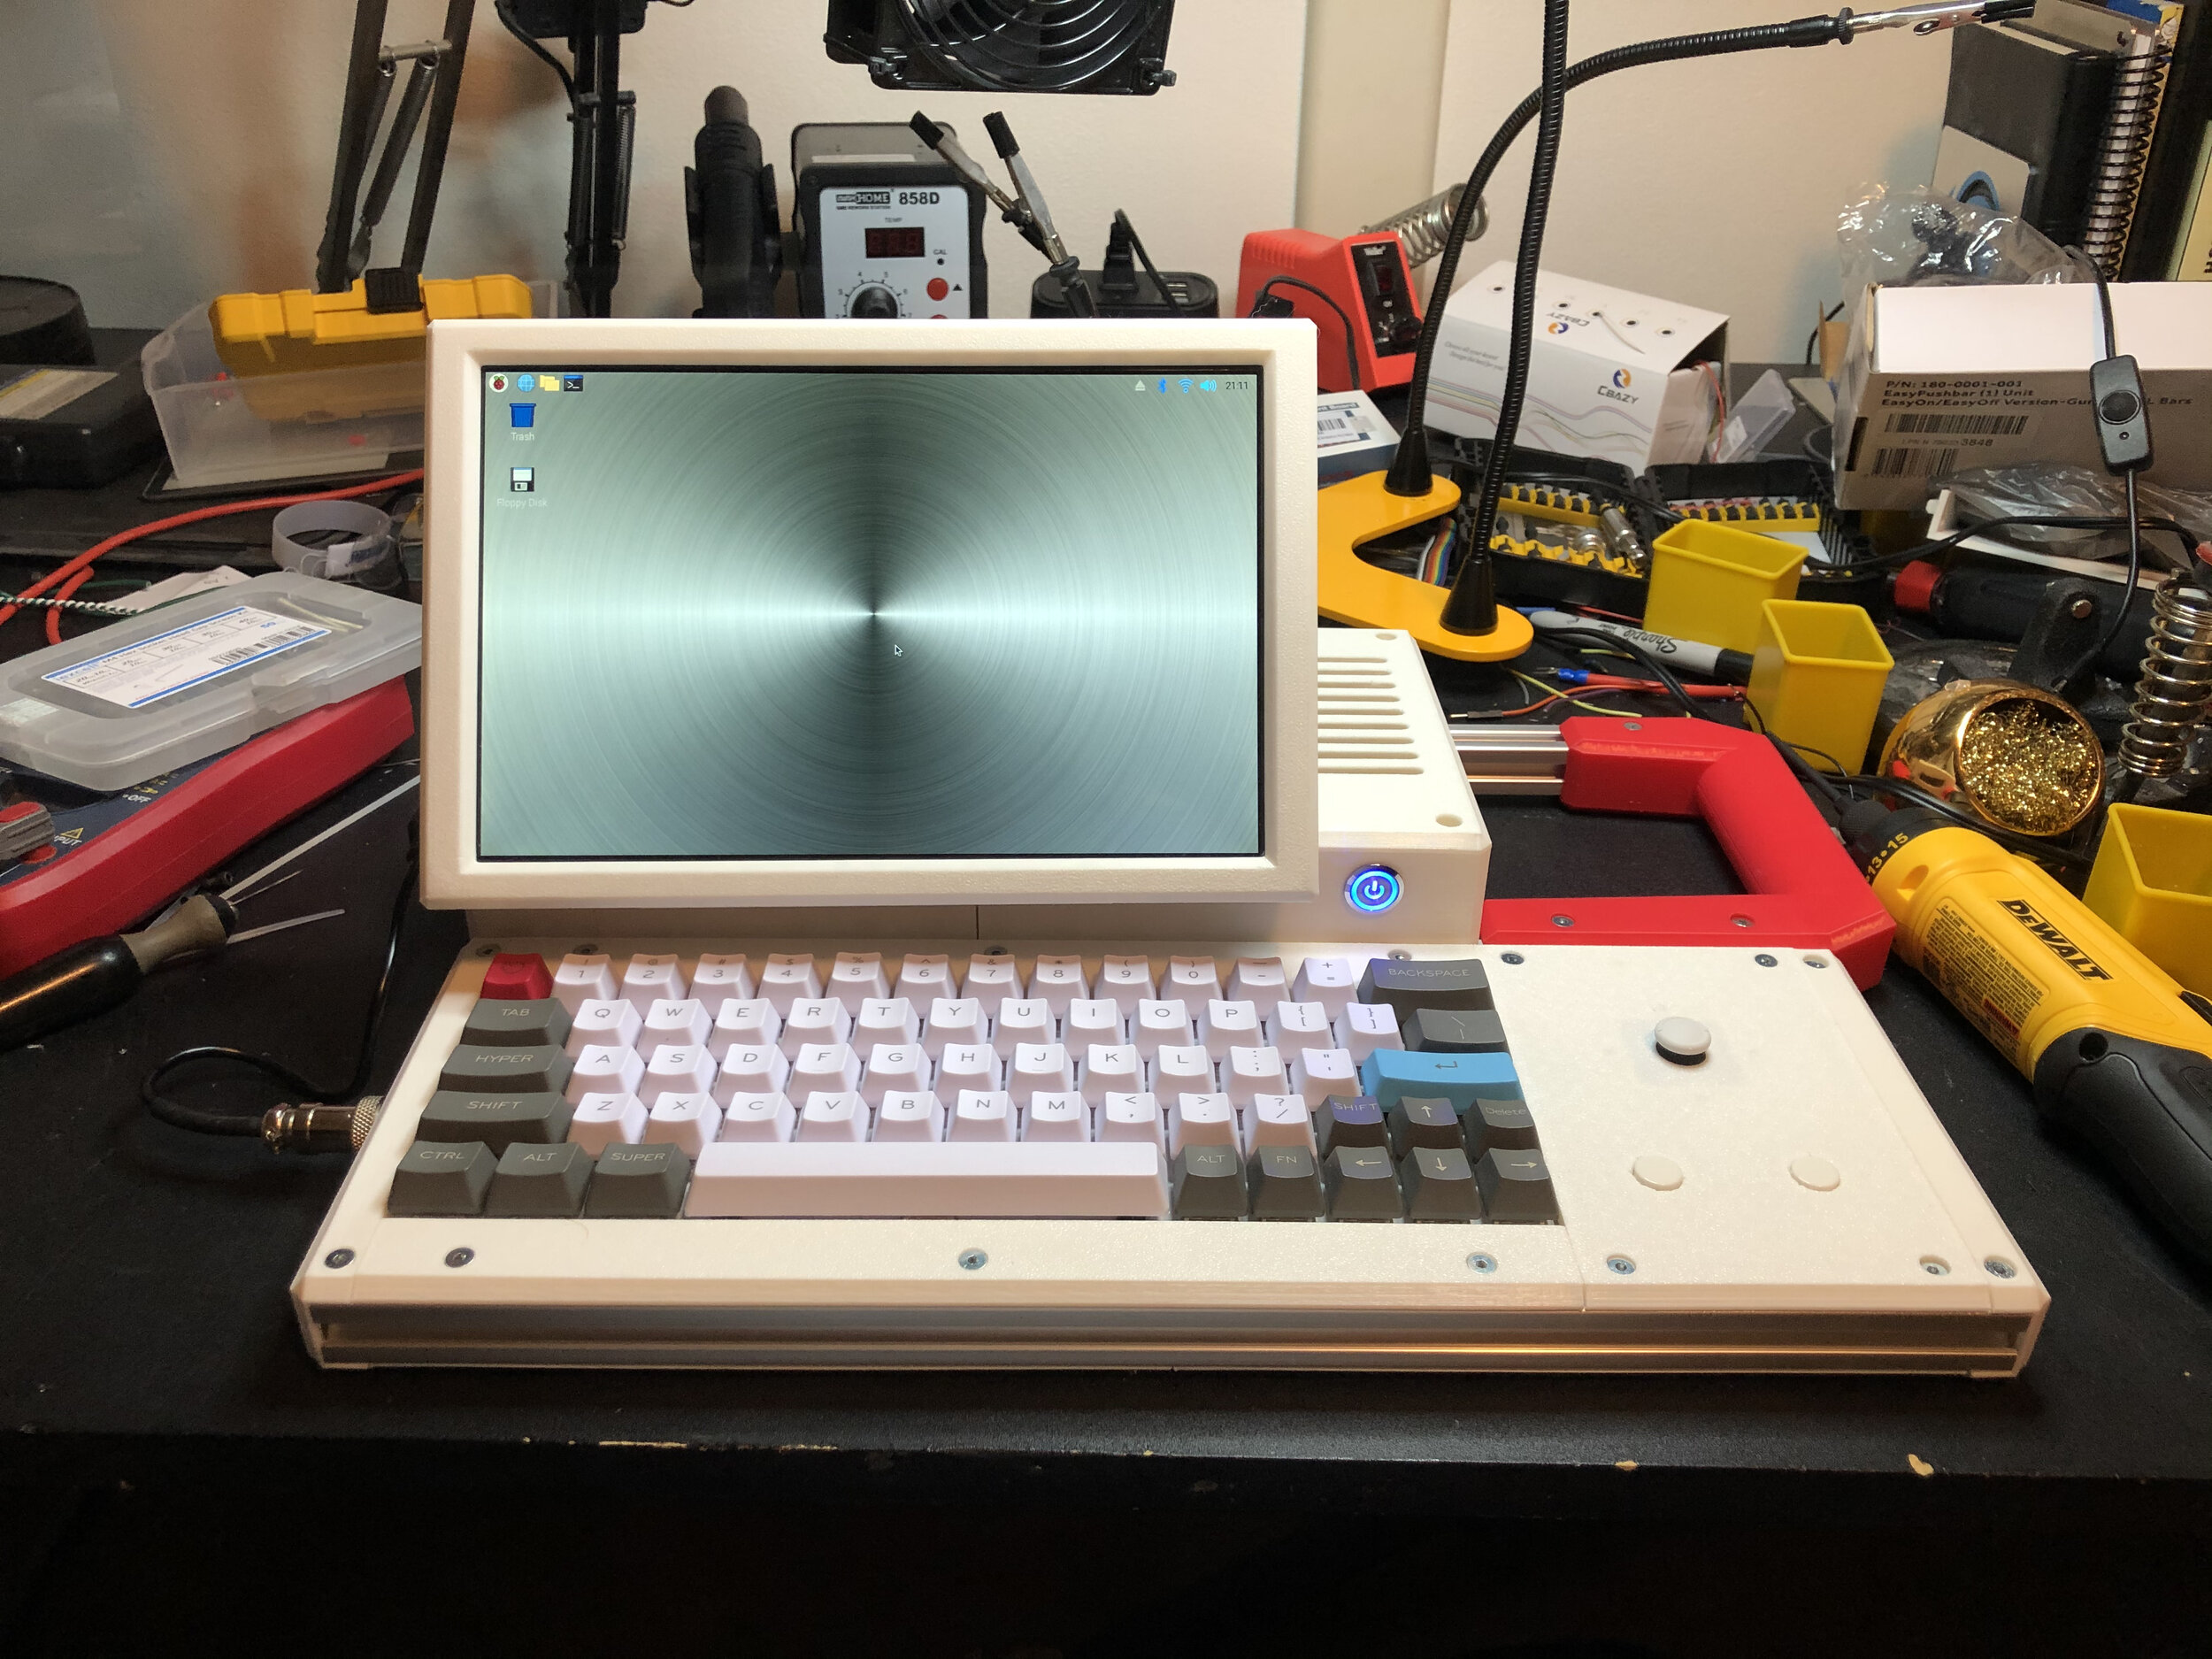
The M3TAL Cyberdeck has gone through many evolutions, iterations, and complete design changes on its way from an idea to reality. I started designing this deck before I actually finished my previous deck, the NX-Yamato.
After the insane labor of love that was finishing the Yamato’s printed body, I wanted to design something that would be much easier to design and would require no sanding. I did however, still want this to be a challenge and include some new techniques so that I could expand my skillset.
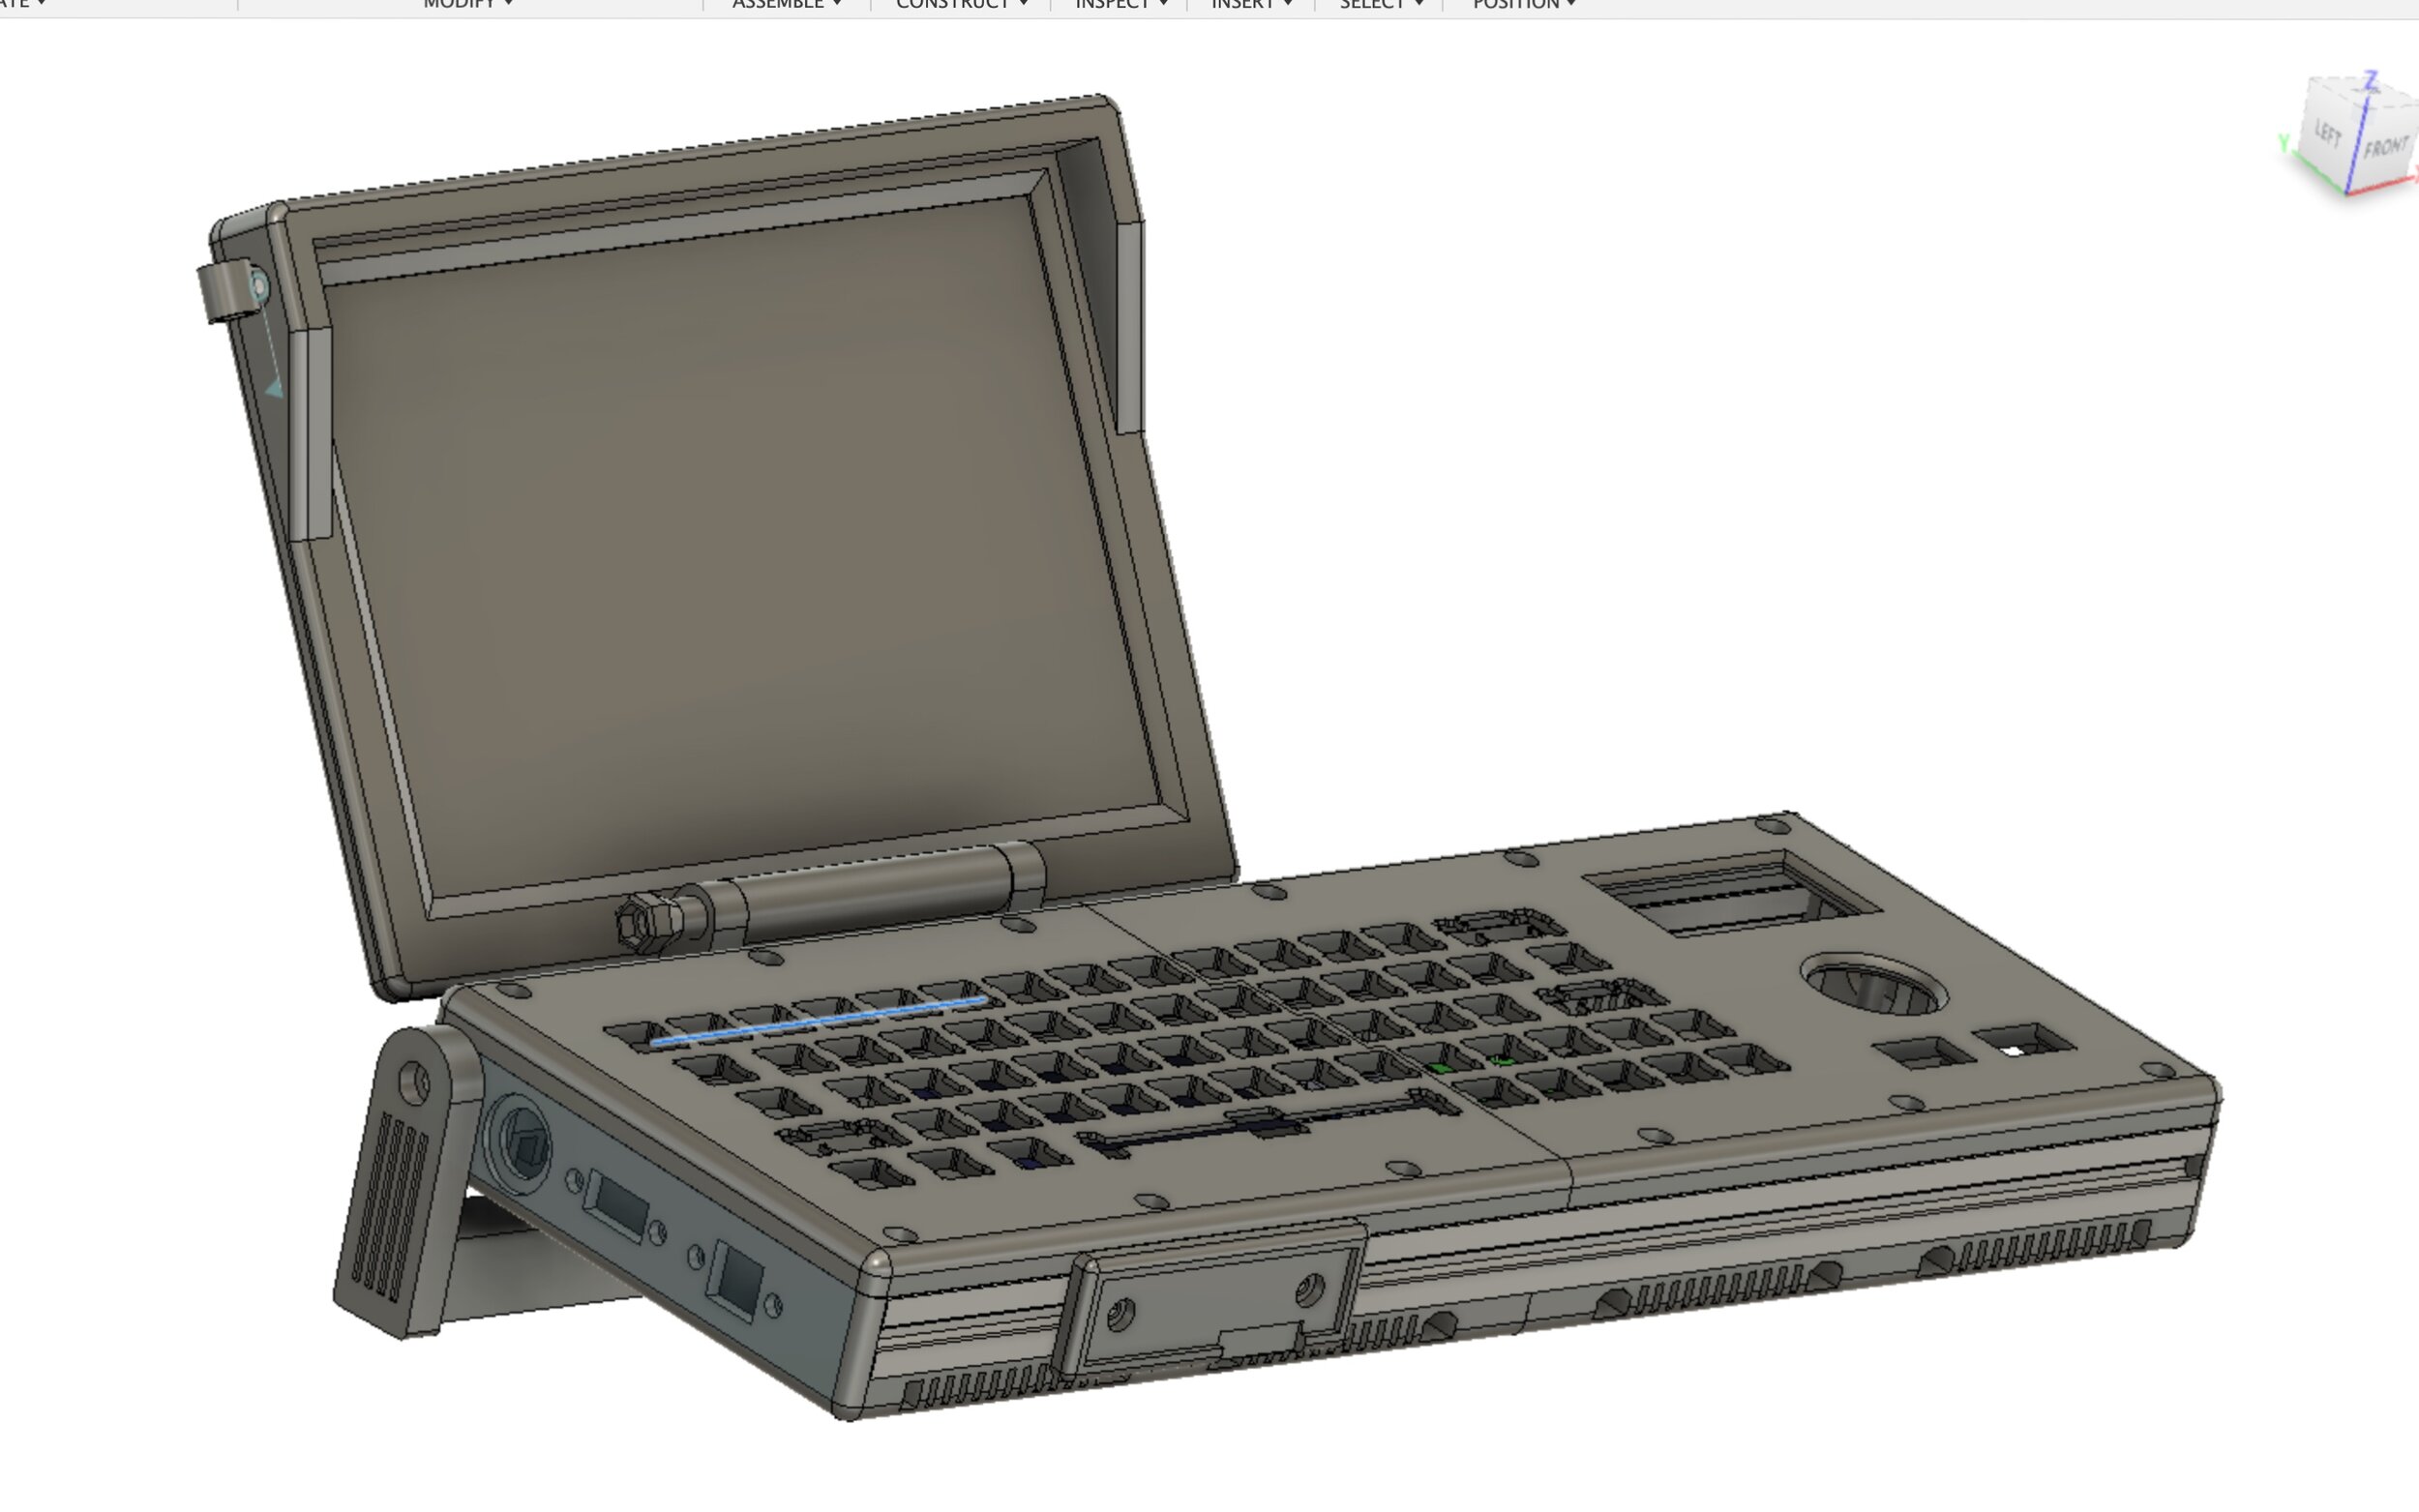
I started out by deciding to base this deck’s construction around 2020 aluminum extrusion. From there, the deck’s thesis statement sort of took shape. This deck was going to be something that would be very easy to put together, take apart, modify, and upgrade. There is no glue in this build at all. Everything is held together with screws or snap fit.
The internals are attached to sleds that snap into the slots on the extrusion, and not to the case of the deck itself. Dealing with mounting holes in the body of Yamato was actually one of the most challenging things of that build, so this is much nicer. It also allows future upgradeability. New SBC or LCD driver? Just pop out the sled and make an updated one. Easy peasy.


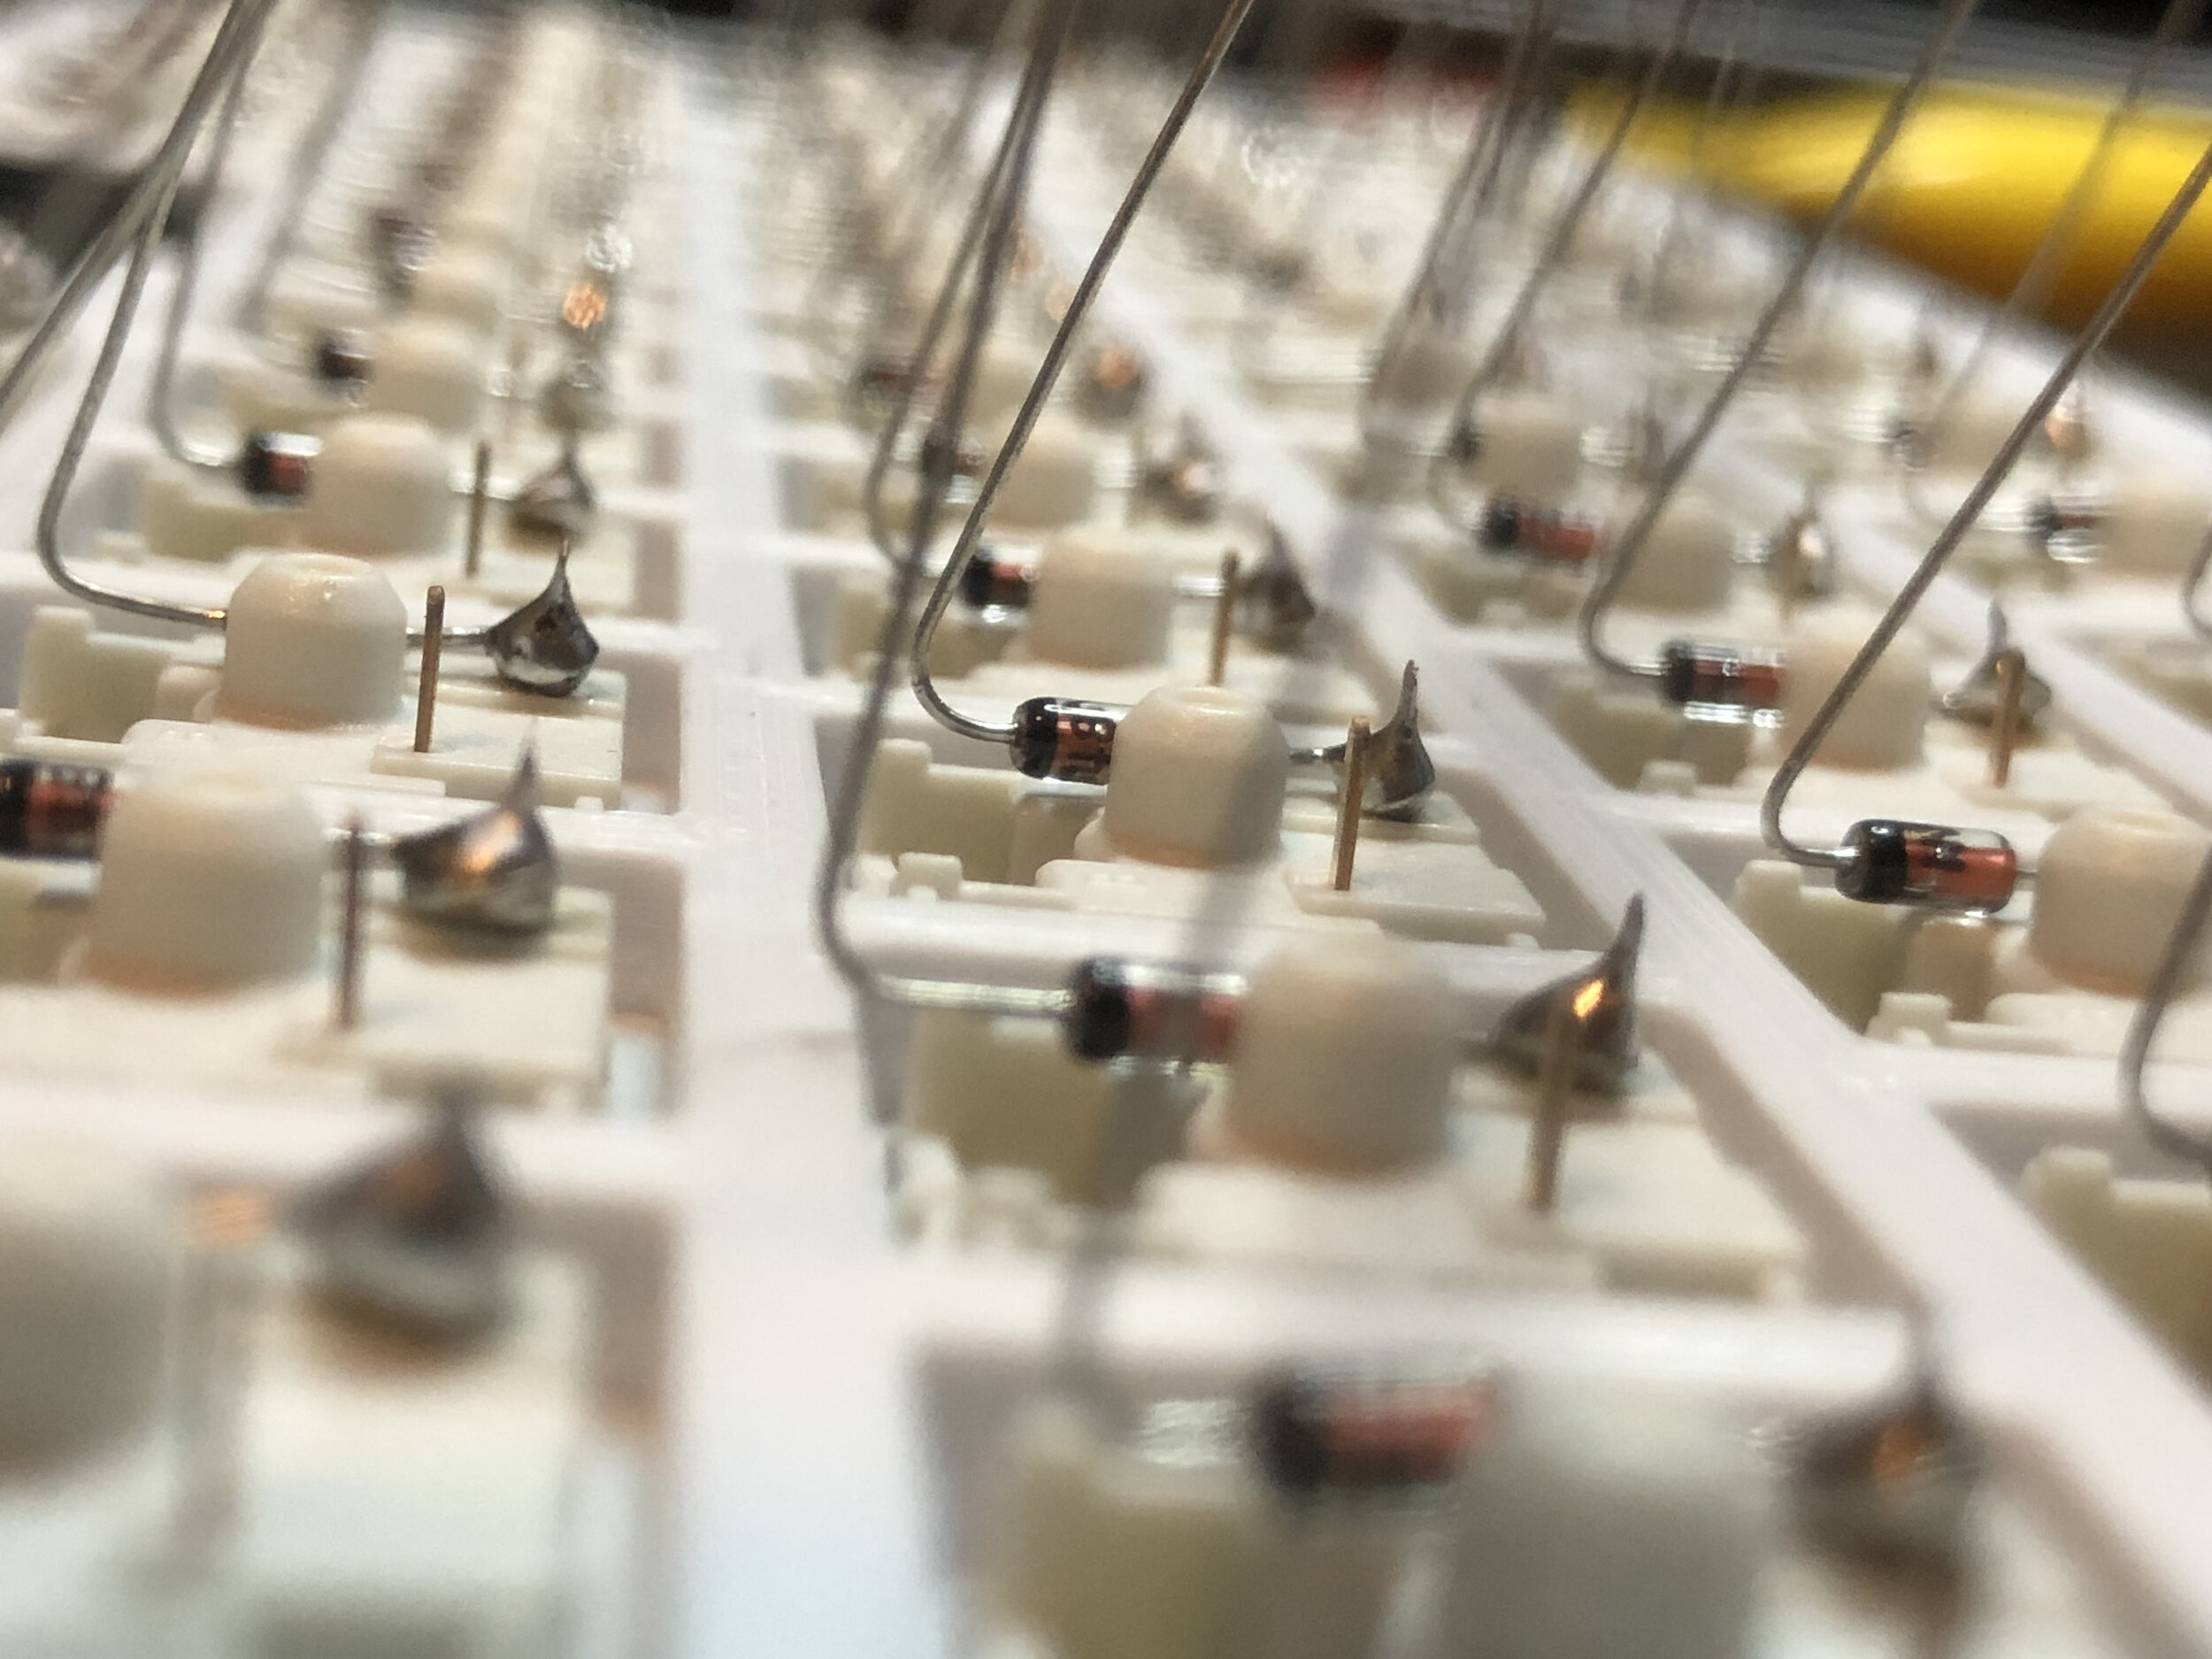
Another feature I wanted to include was a hand wired mechanical keyboard. I found myself in awe of some of the beautiful wiring and soldering jobs in some of the keyboards featured on Hackaday. I knew I wanted to try it. I’ve always been fairly confident in my soldering skills, but I was still shocked that there weren’t any errors in the wiring and it worked on the first try. I did however have a bit of trouble with the firmware on the Teensy that was controlling the keeb.
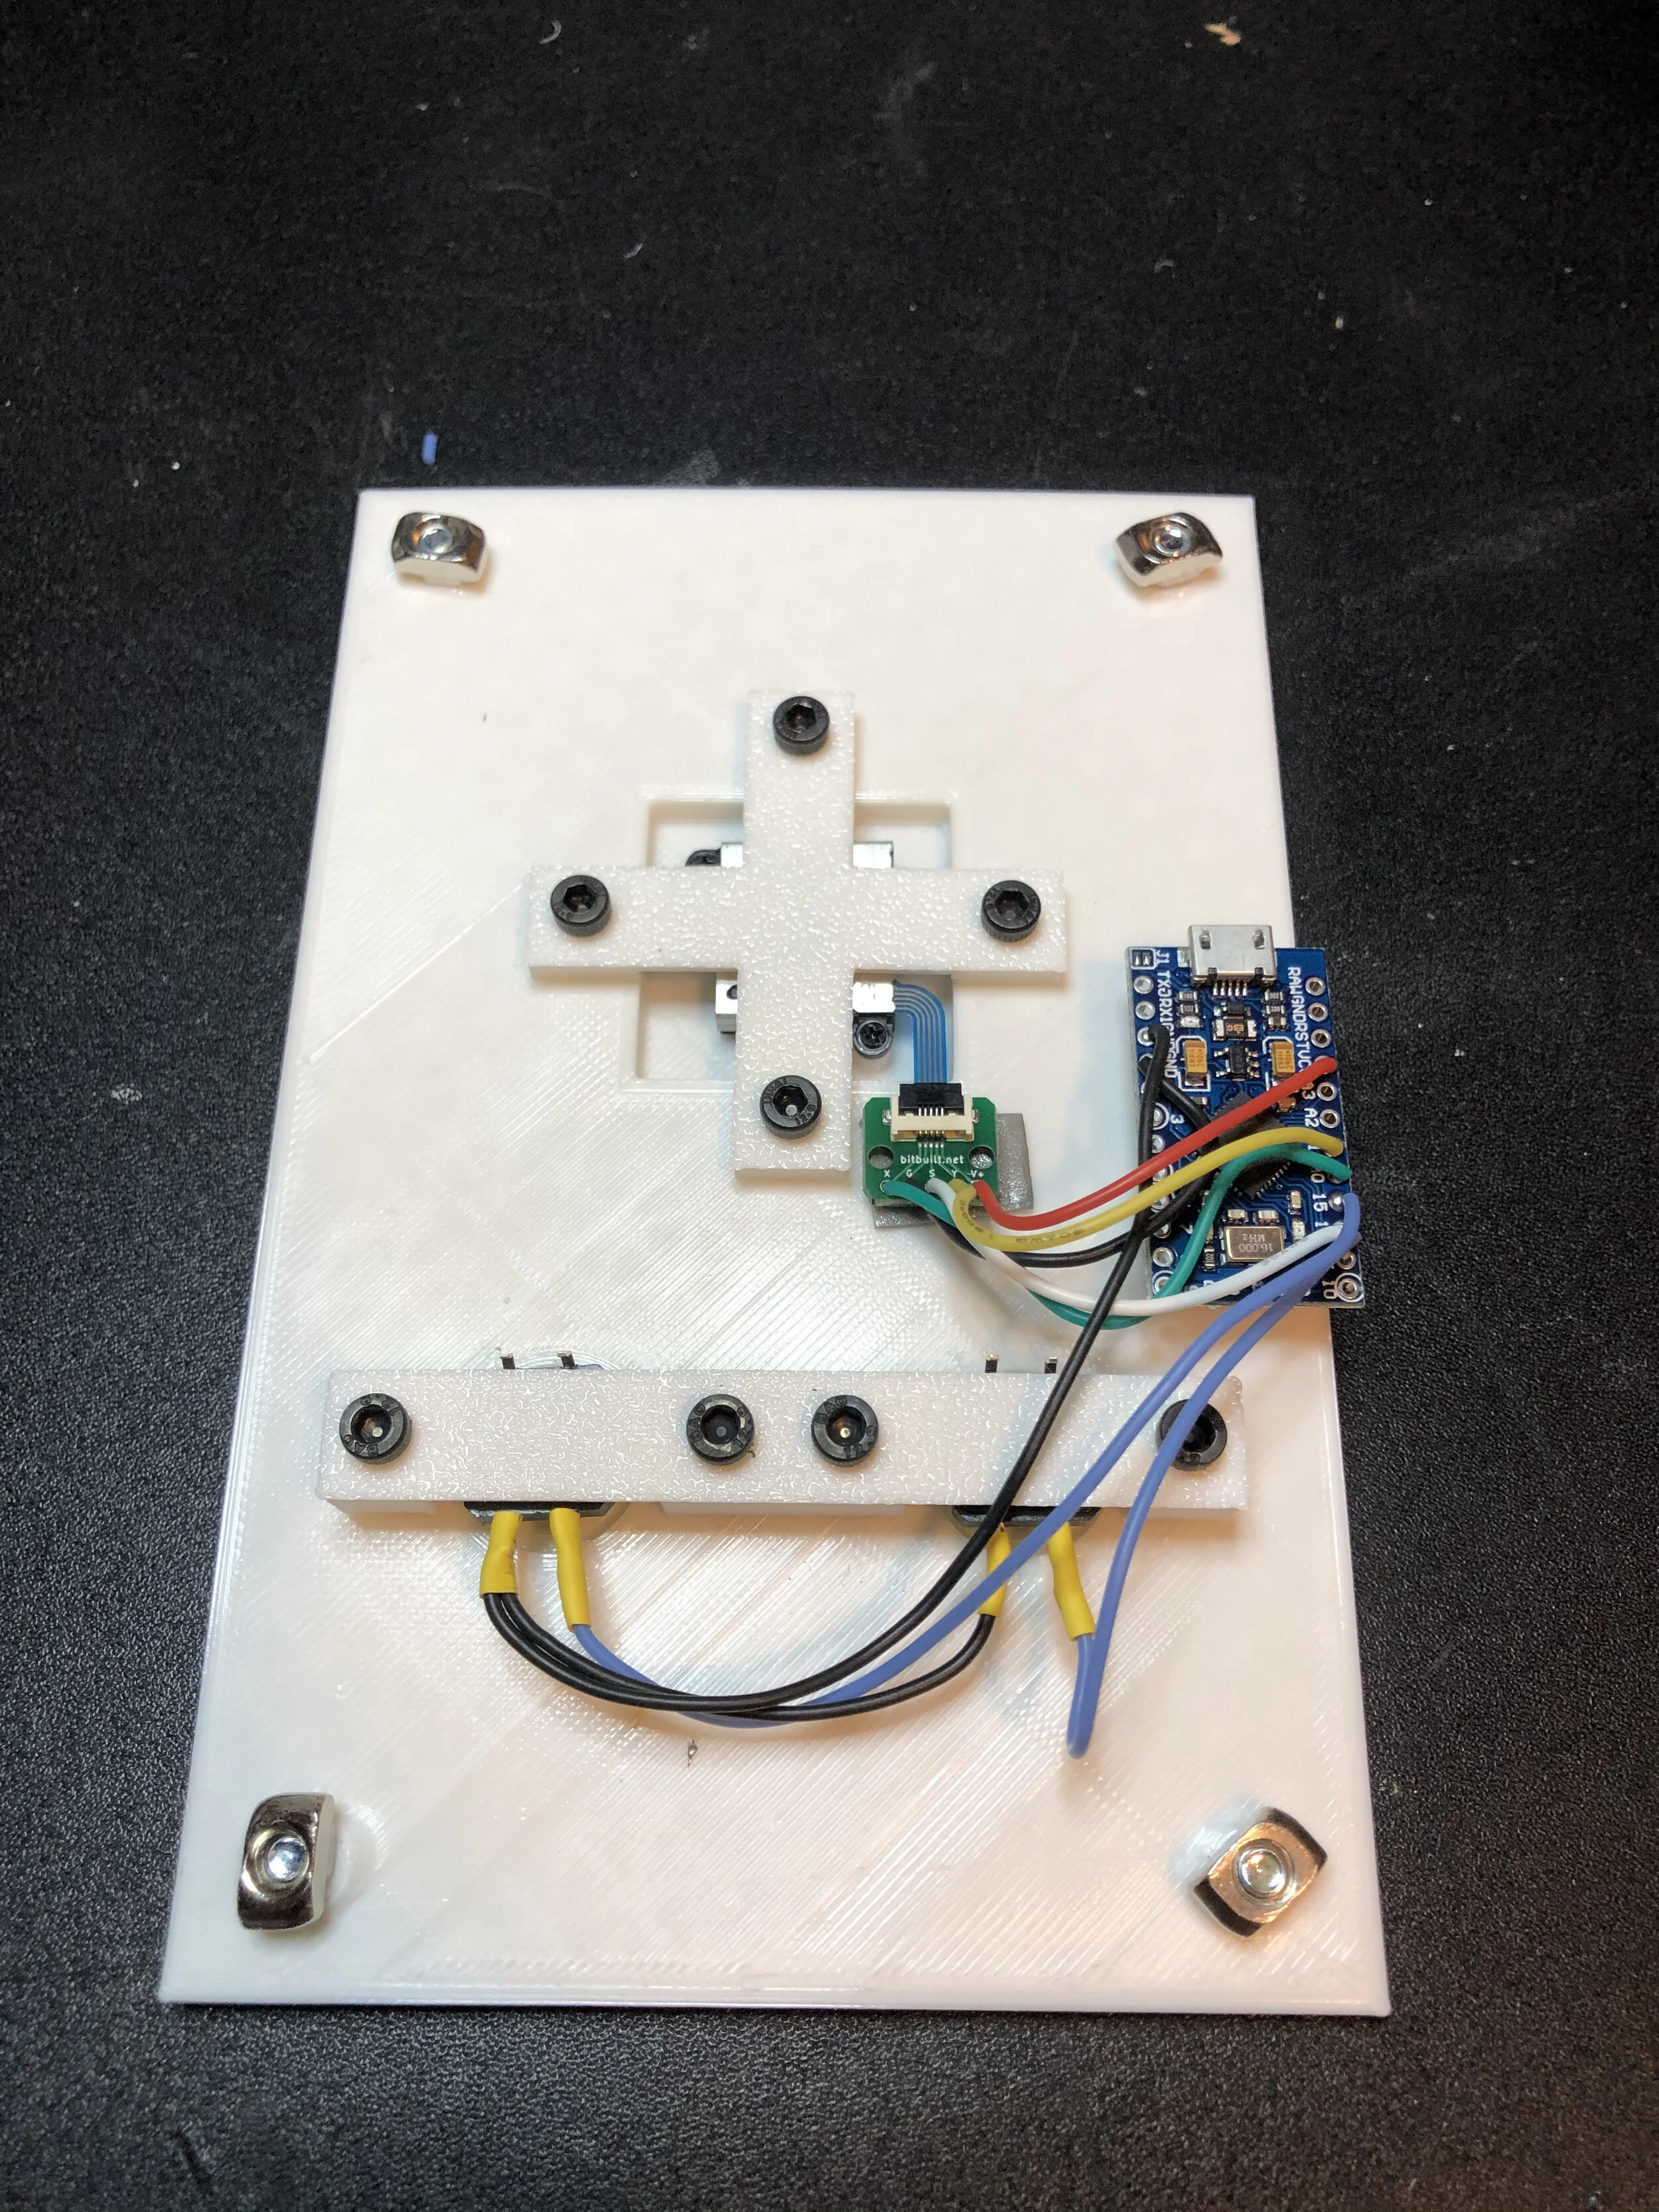
Everything was backwards! Thankfully a mechanical keyboard aficionado friend of mine was able to quickly pinpoint my mistake and it was up and running in no time. Talk about confidence boost! Then it was on to the pointer. Once again I decided to utilize a joystick, this time from a Nintendo JoyCon controller, as the pointing device.
The travel of the smaller joystick is far more pleasant than the larger generic 2 axis analog stick I used in Yamato. Also tried a couple different PSP joysticks, and the quality was just not there in those aftermarket parts. Thanks to the handy breakout board for the JoyCon ribbon cable from the folks over at BitBuilt, it all worked out quite nicely.

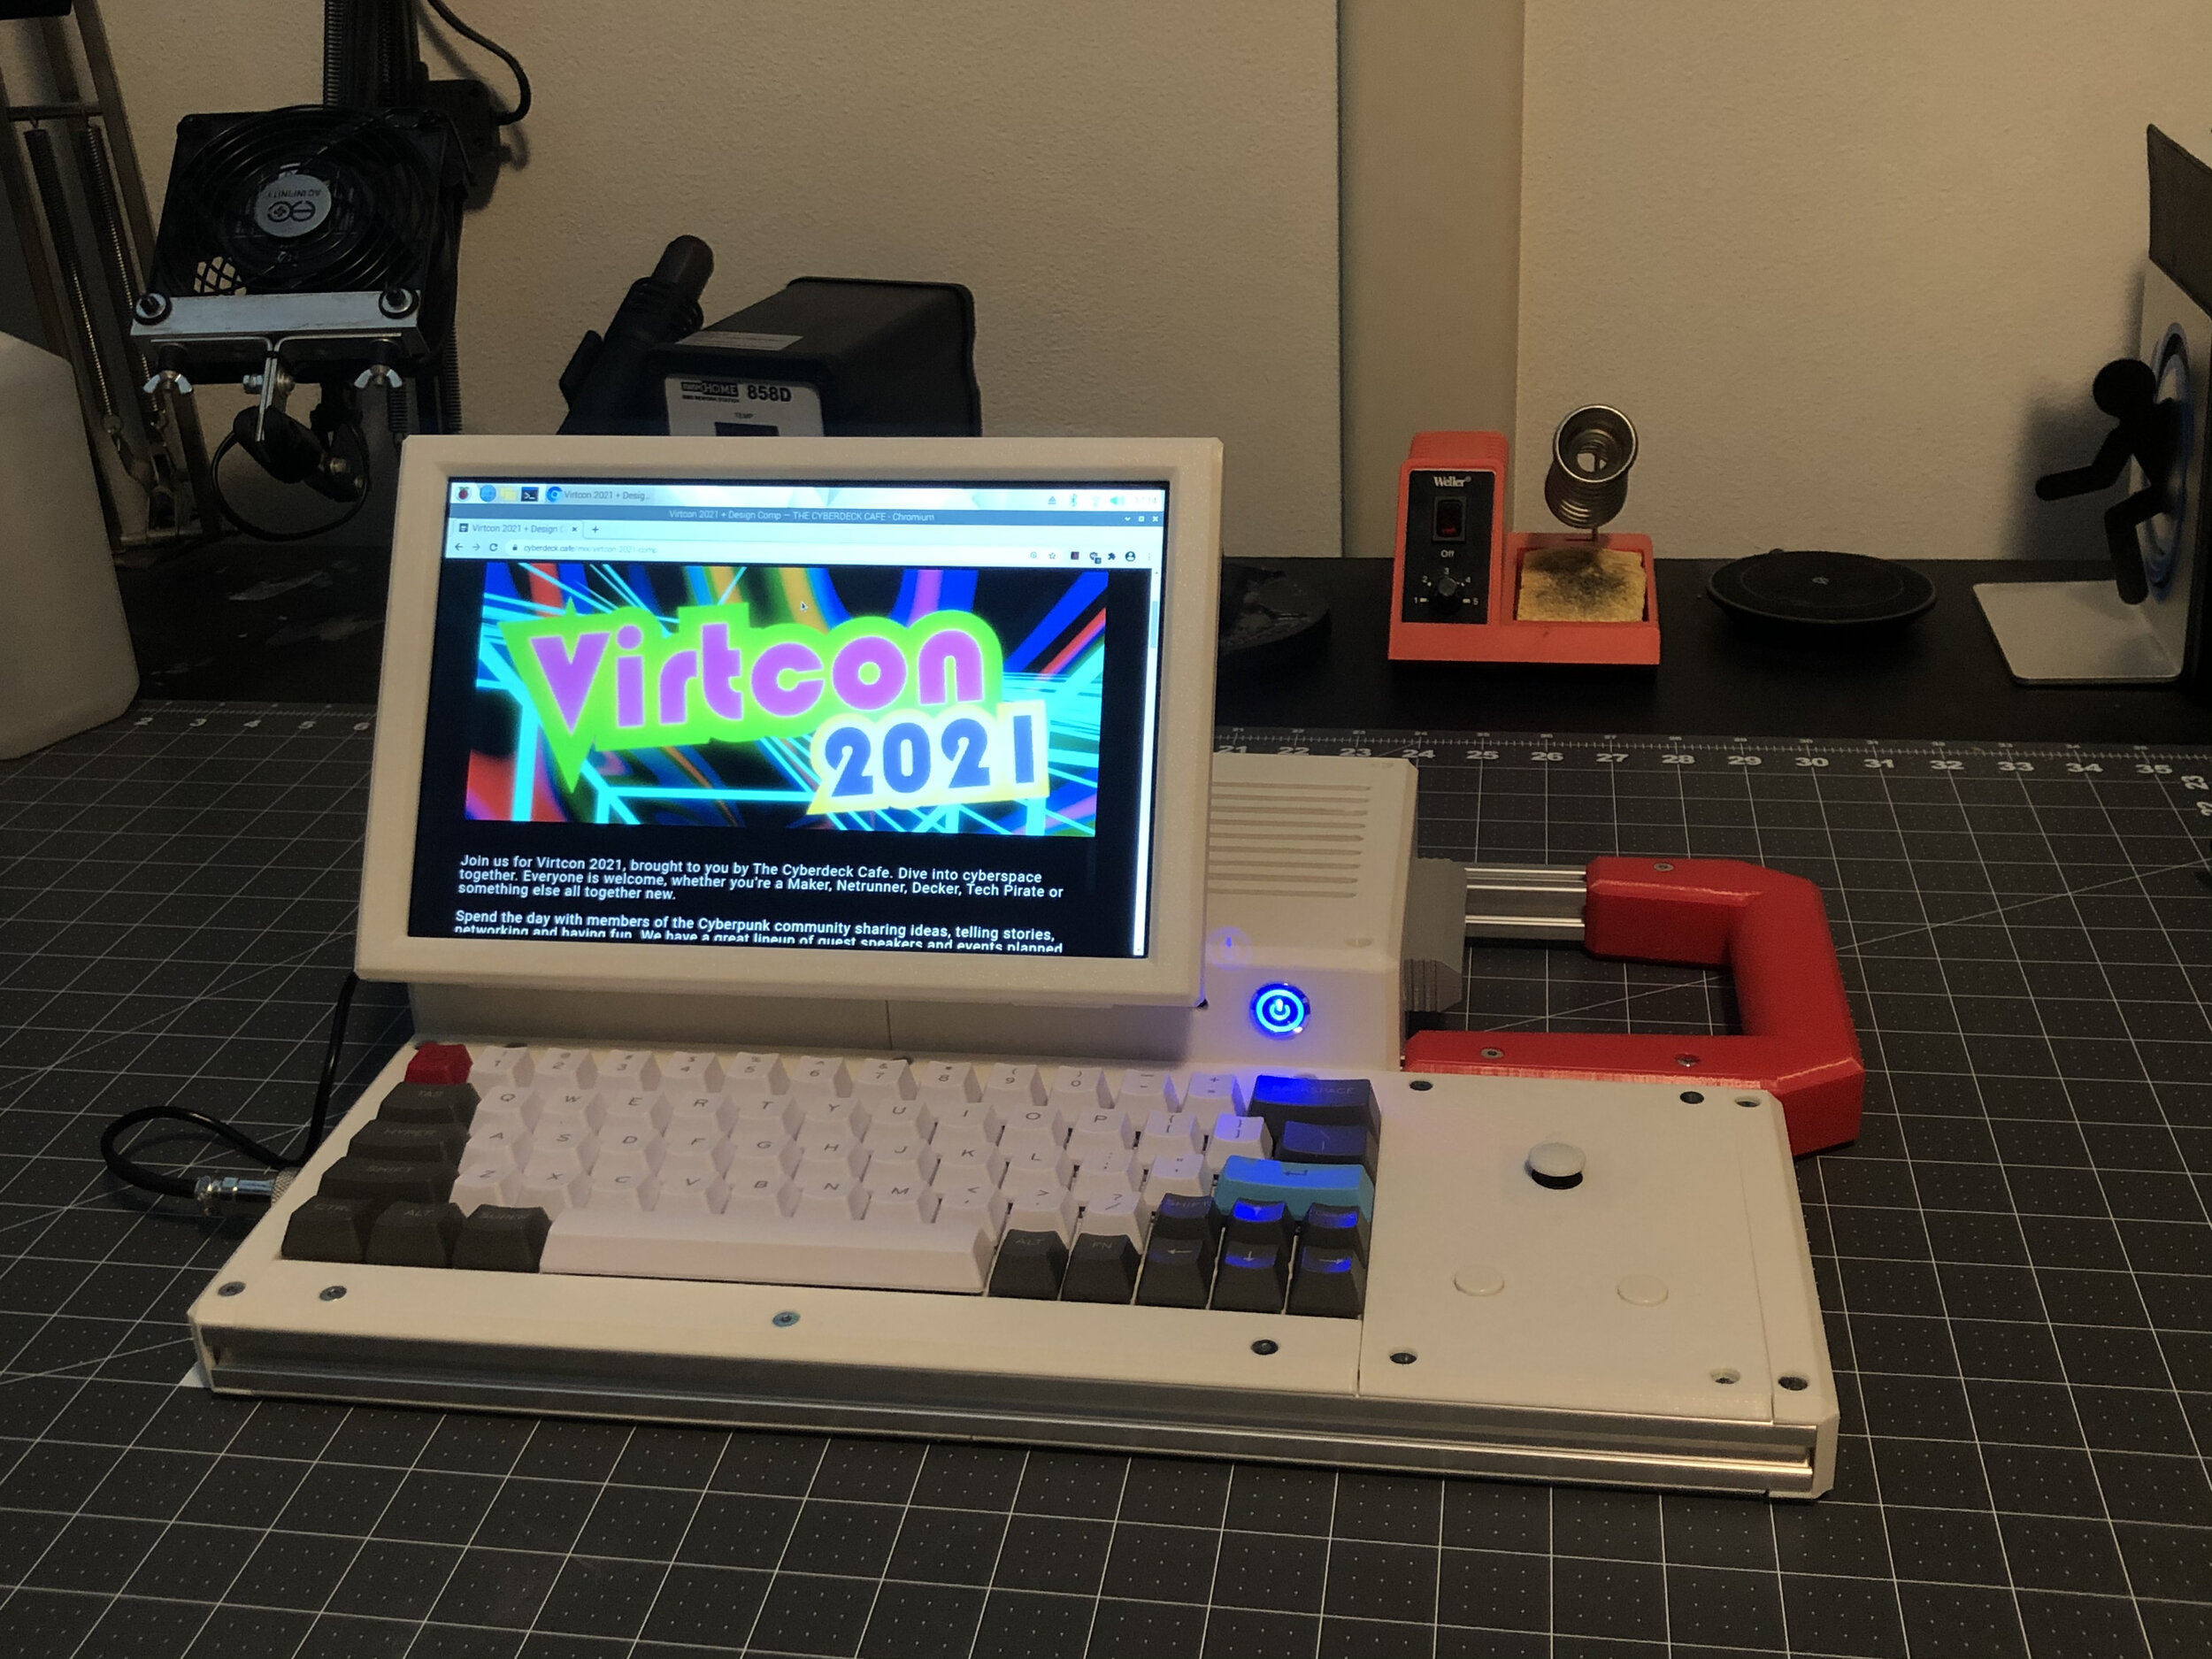
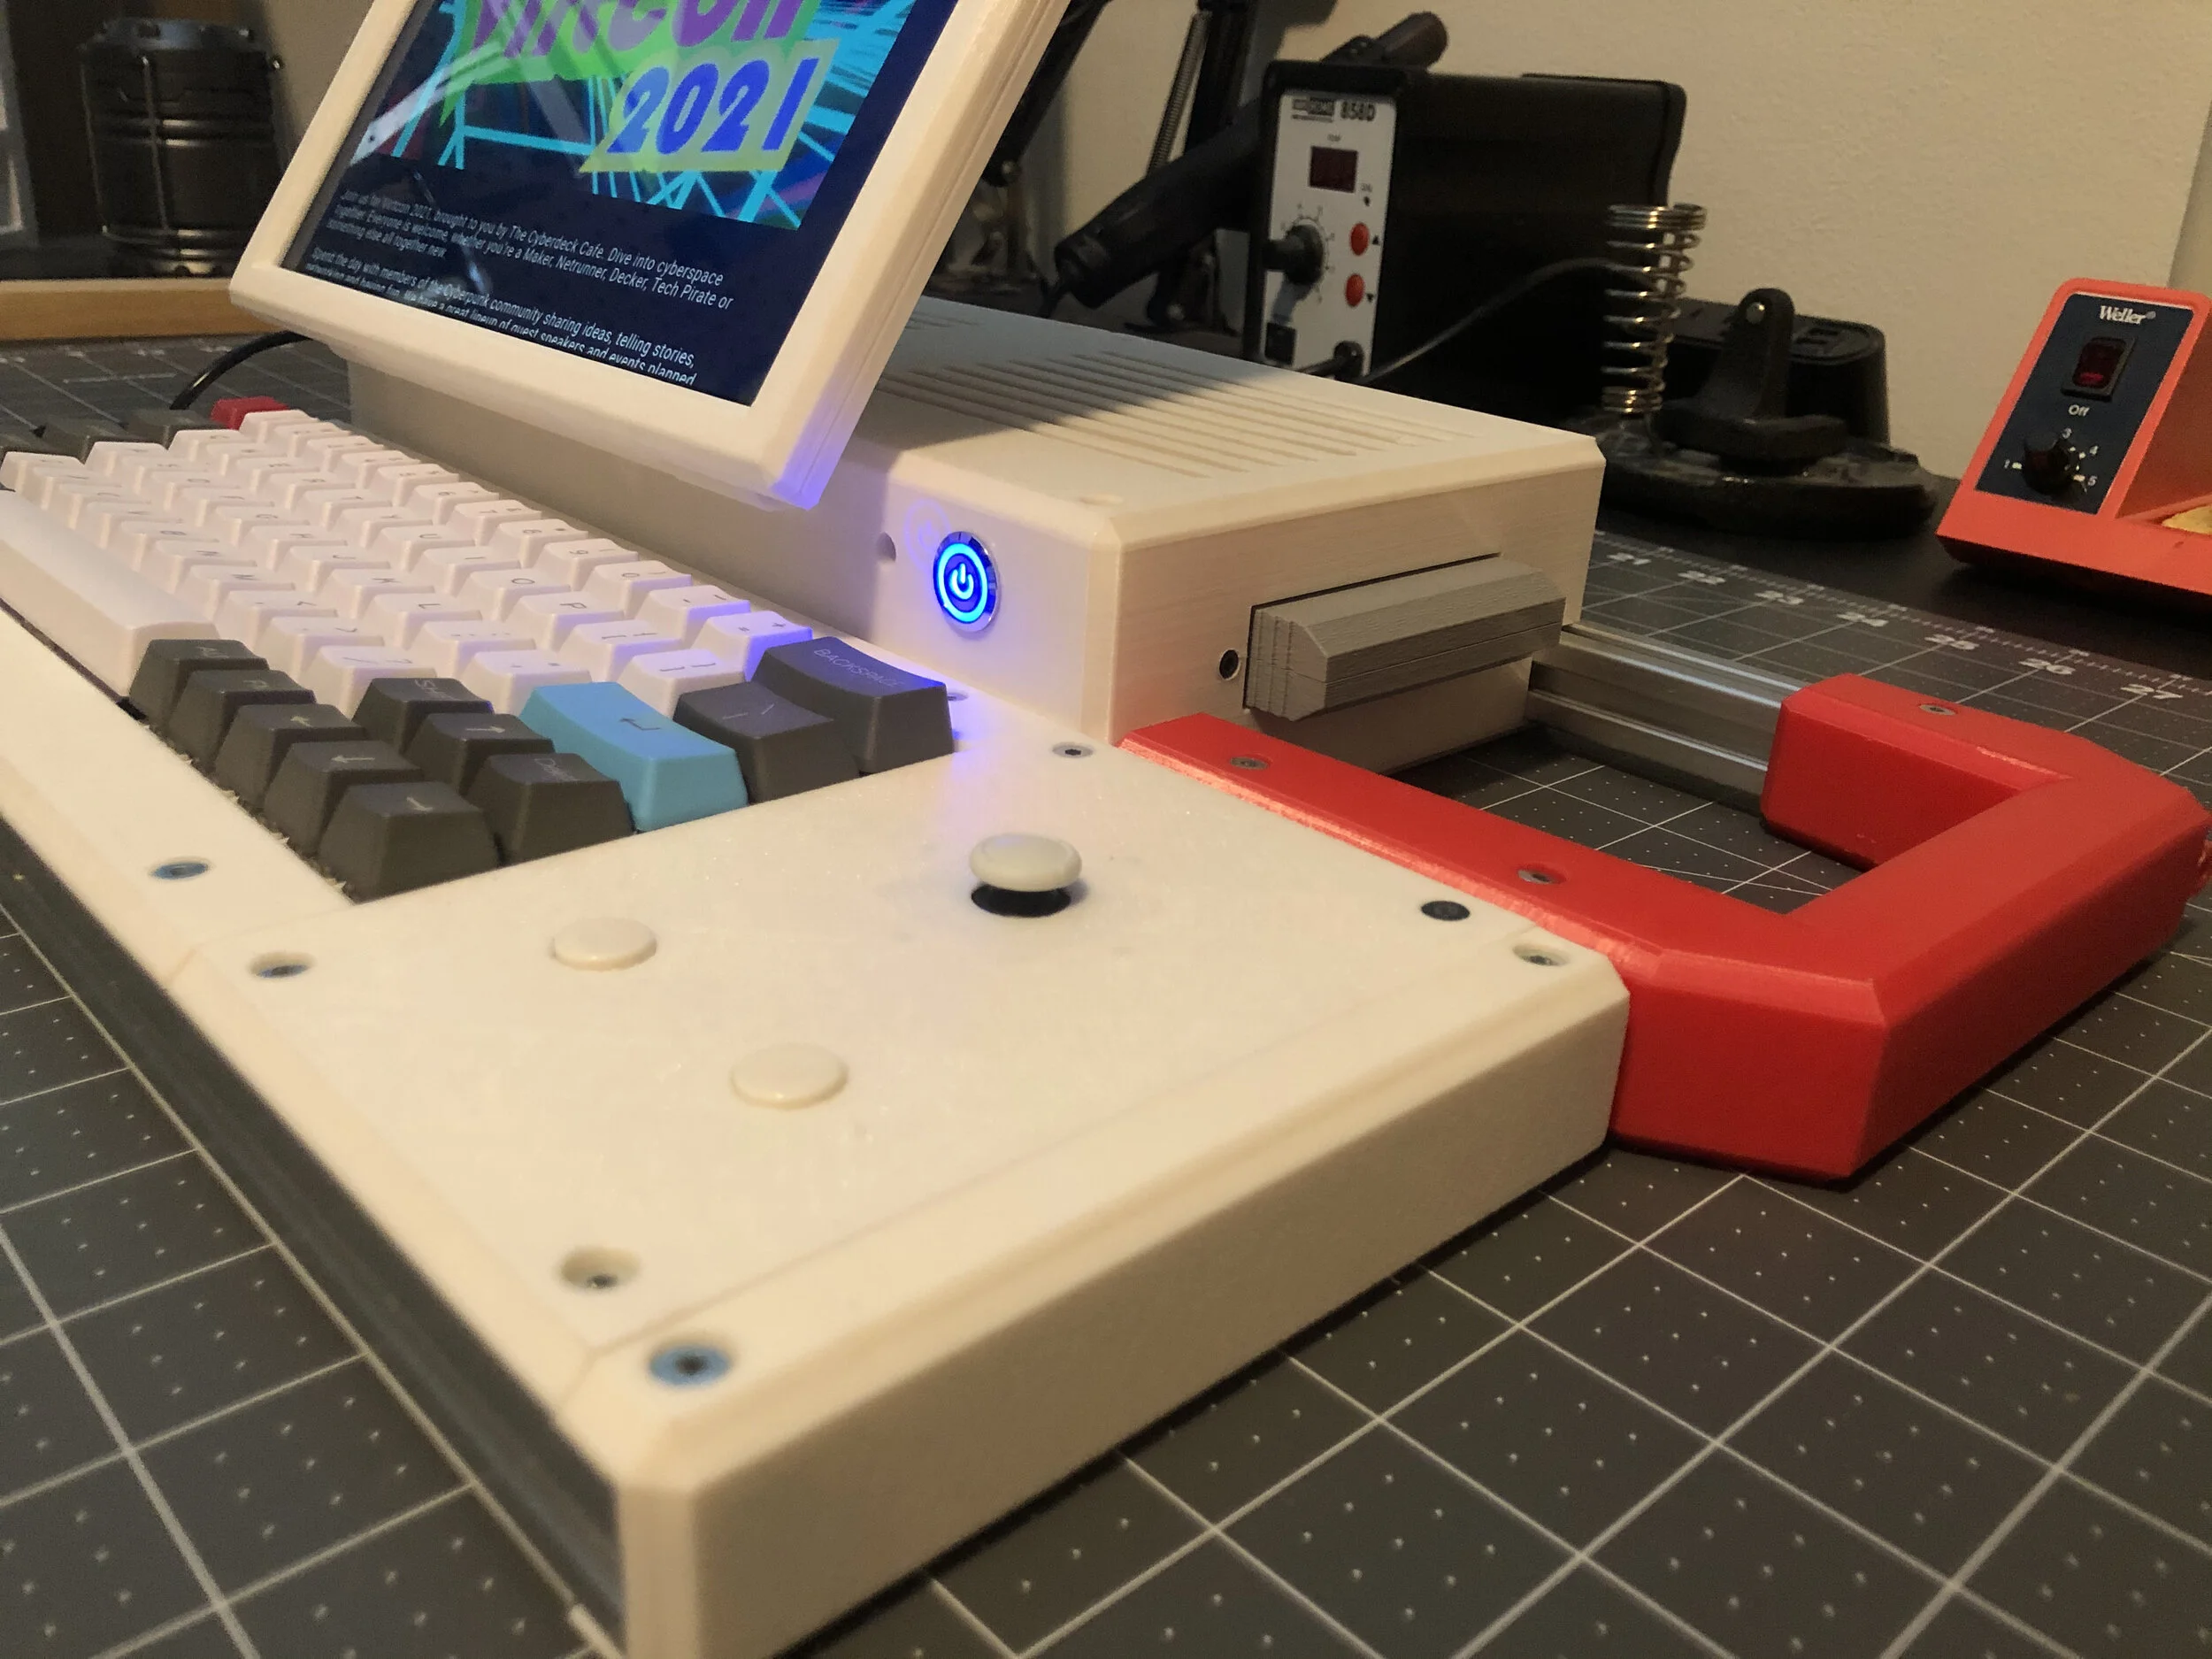
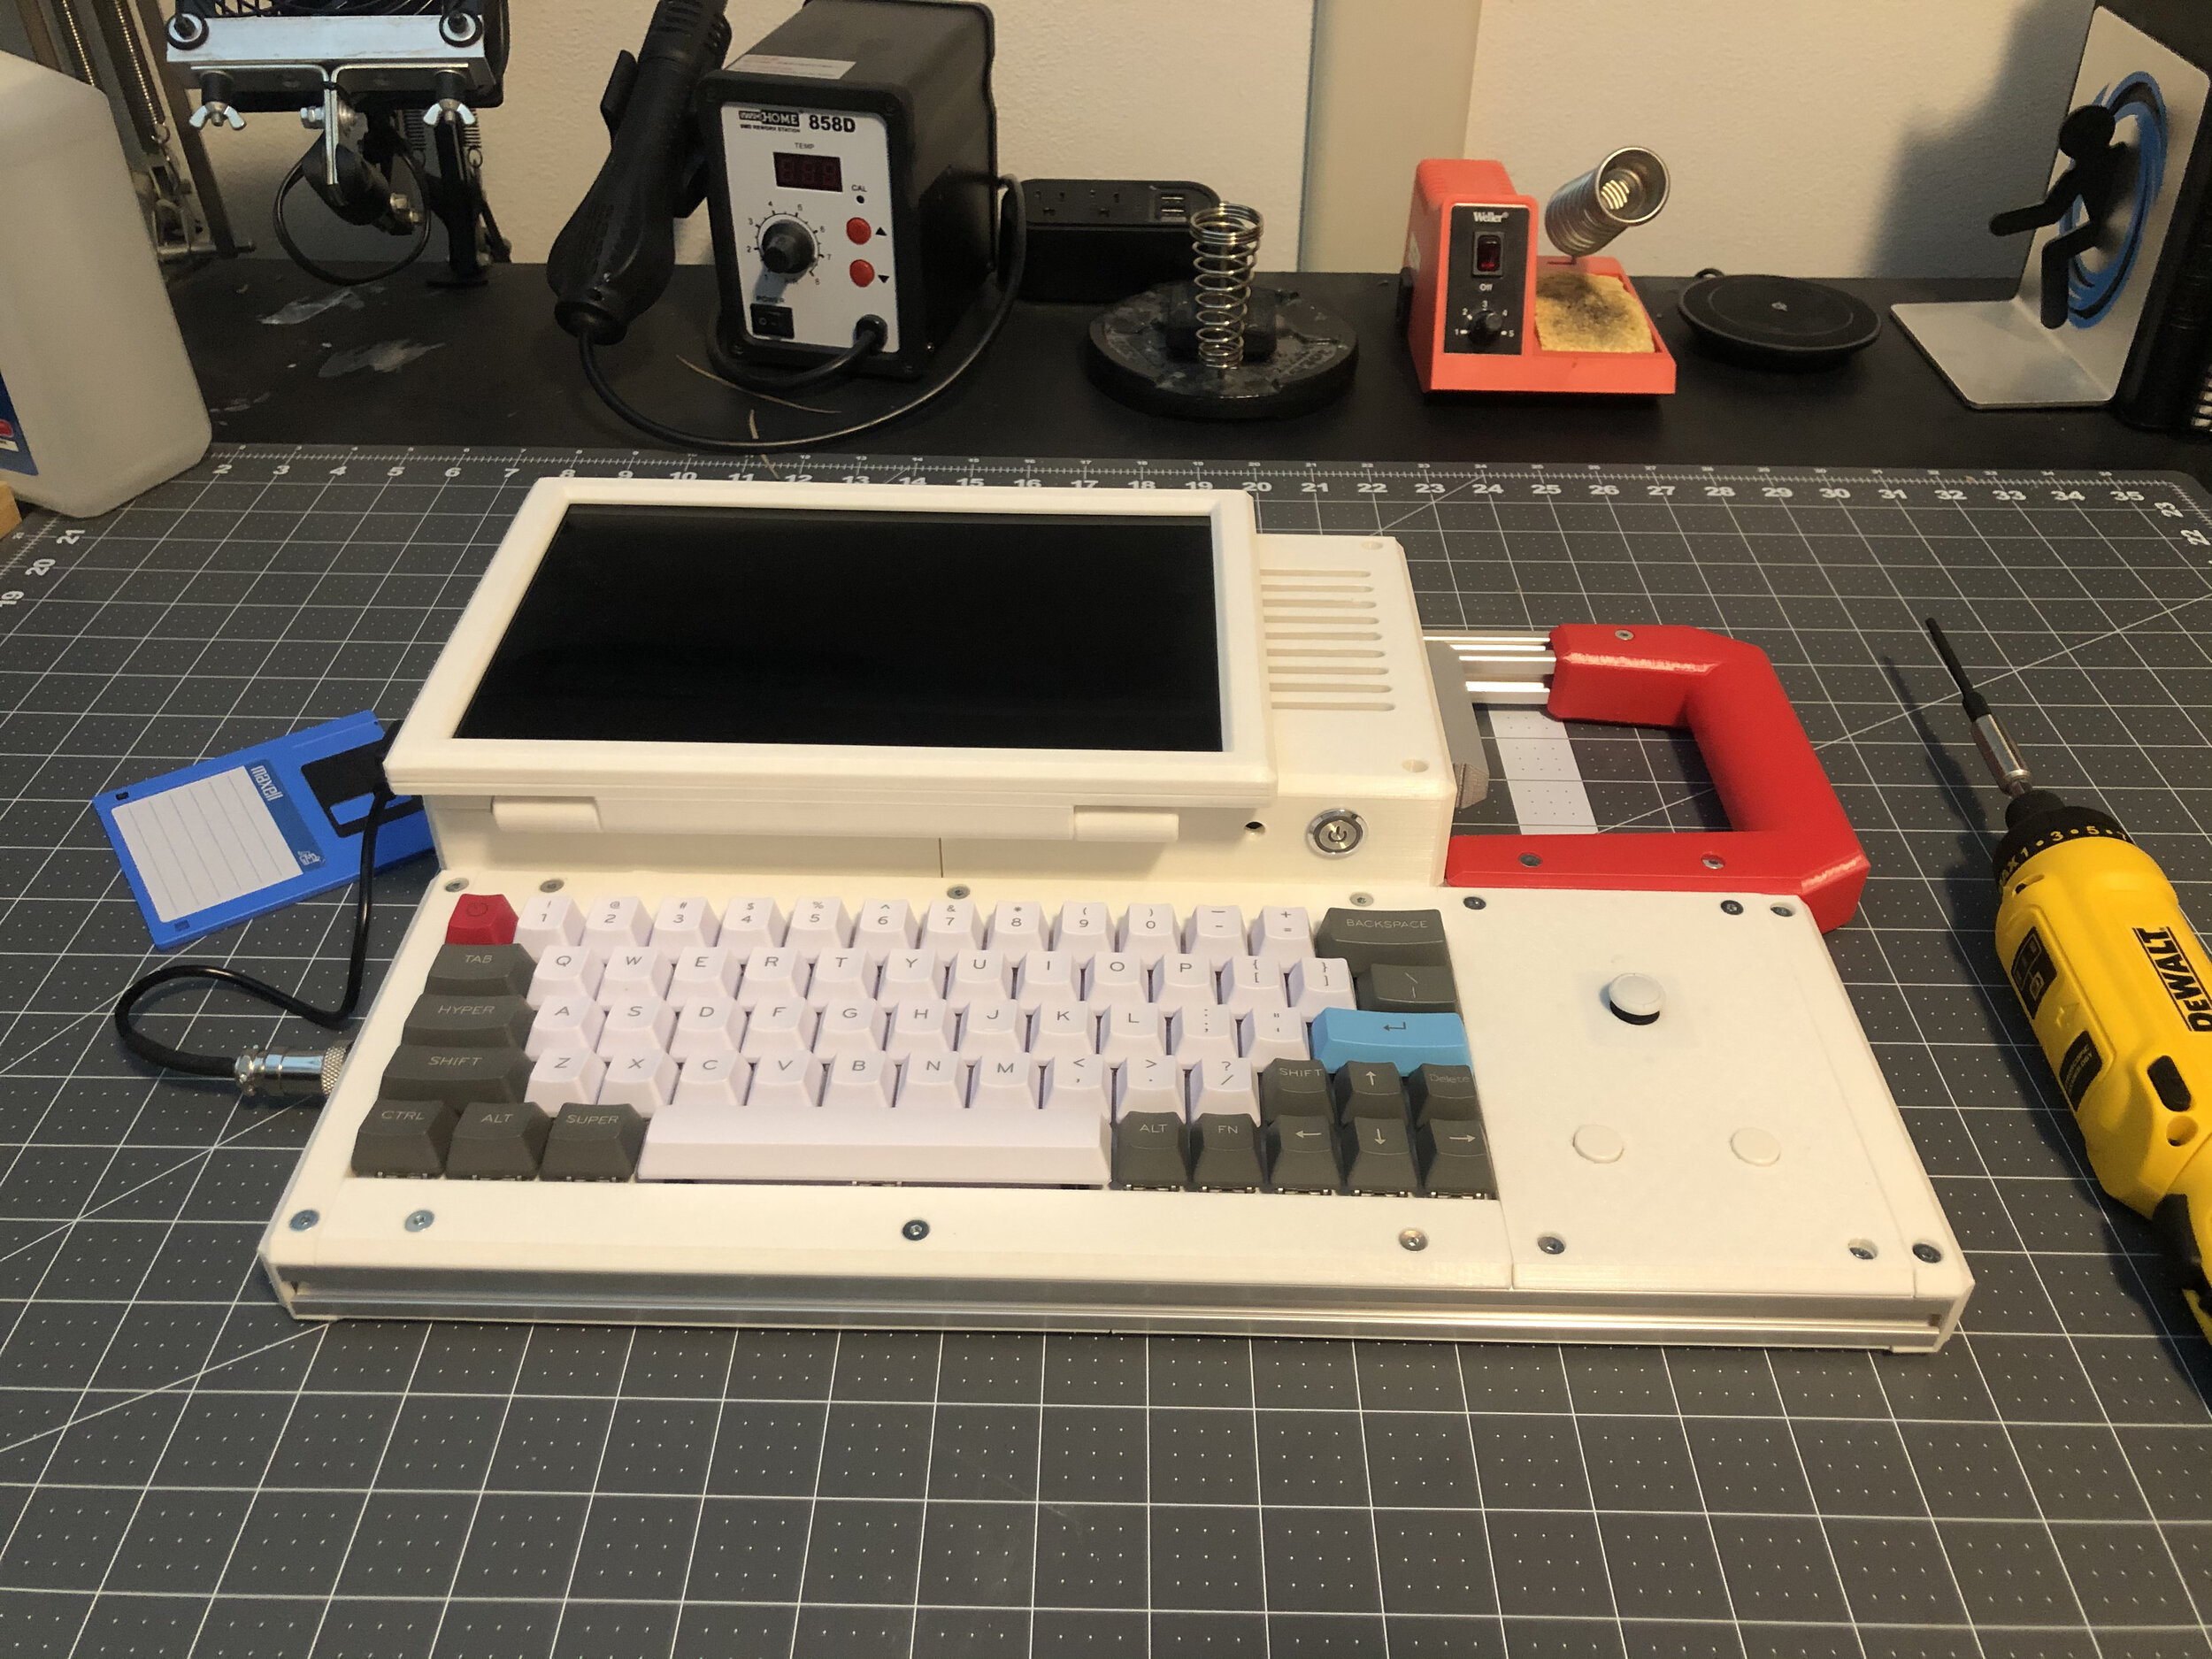
This deck is powered by a Raspberry Pi4 4GB, with a 64GB SD card. It also features 2 forms of removable storage: a 3.5 inch floppy drive, and a RetroCart slot. I was super excited to include Tom Nardi’s RetroCart system in M3TAL. It really gives the deck that 80s vibe and feel. Its super satisfying to use, and since its based on USB 3, there’s possibility for future accessories like an SDR. I decided to power M3TAL using an X705 power board and two 26650 batteries. T
hese bad boys pack 4244 mAh of power in each cell, giving M3TAL the ability to actually be useful on the go for a meaningful length of time. The LCD is the same tried and true 10.1” panel that was in Yamato.


The biggest challenge I faced in this build was definitely wire management. There were quite a few cables from the floppy drive, RetroCart, batteries, and panel mounted port extenders that had to be bent and Tetris’d into place. I ended up taking the thick rubber sheathing off of most of the cables which allowed me to be more creative with how they bent and folded into place.
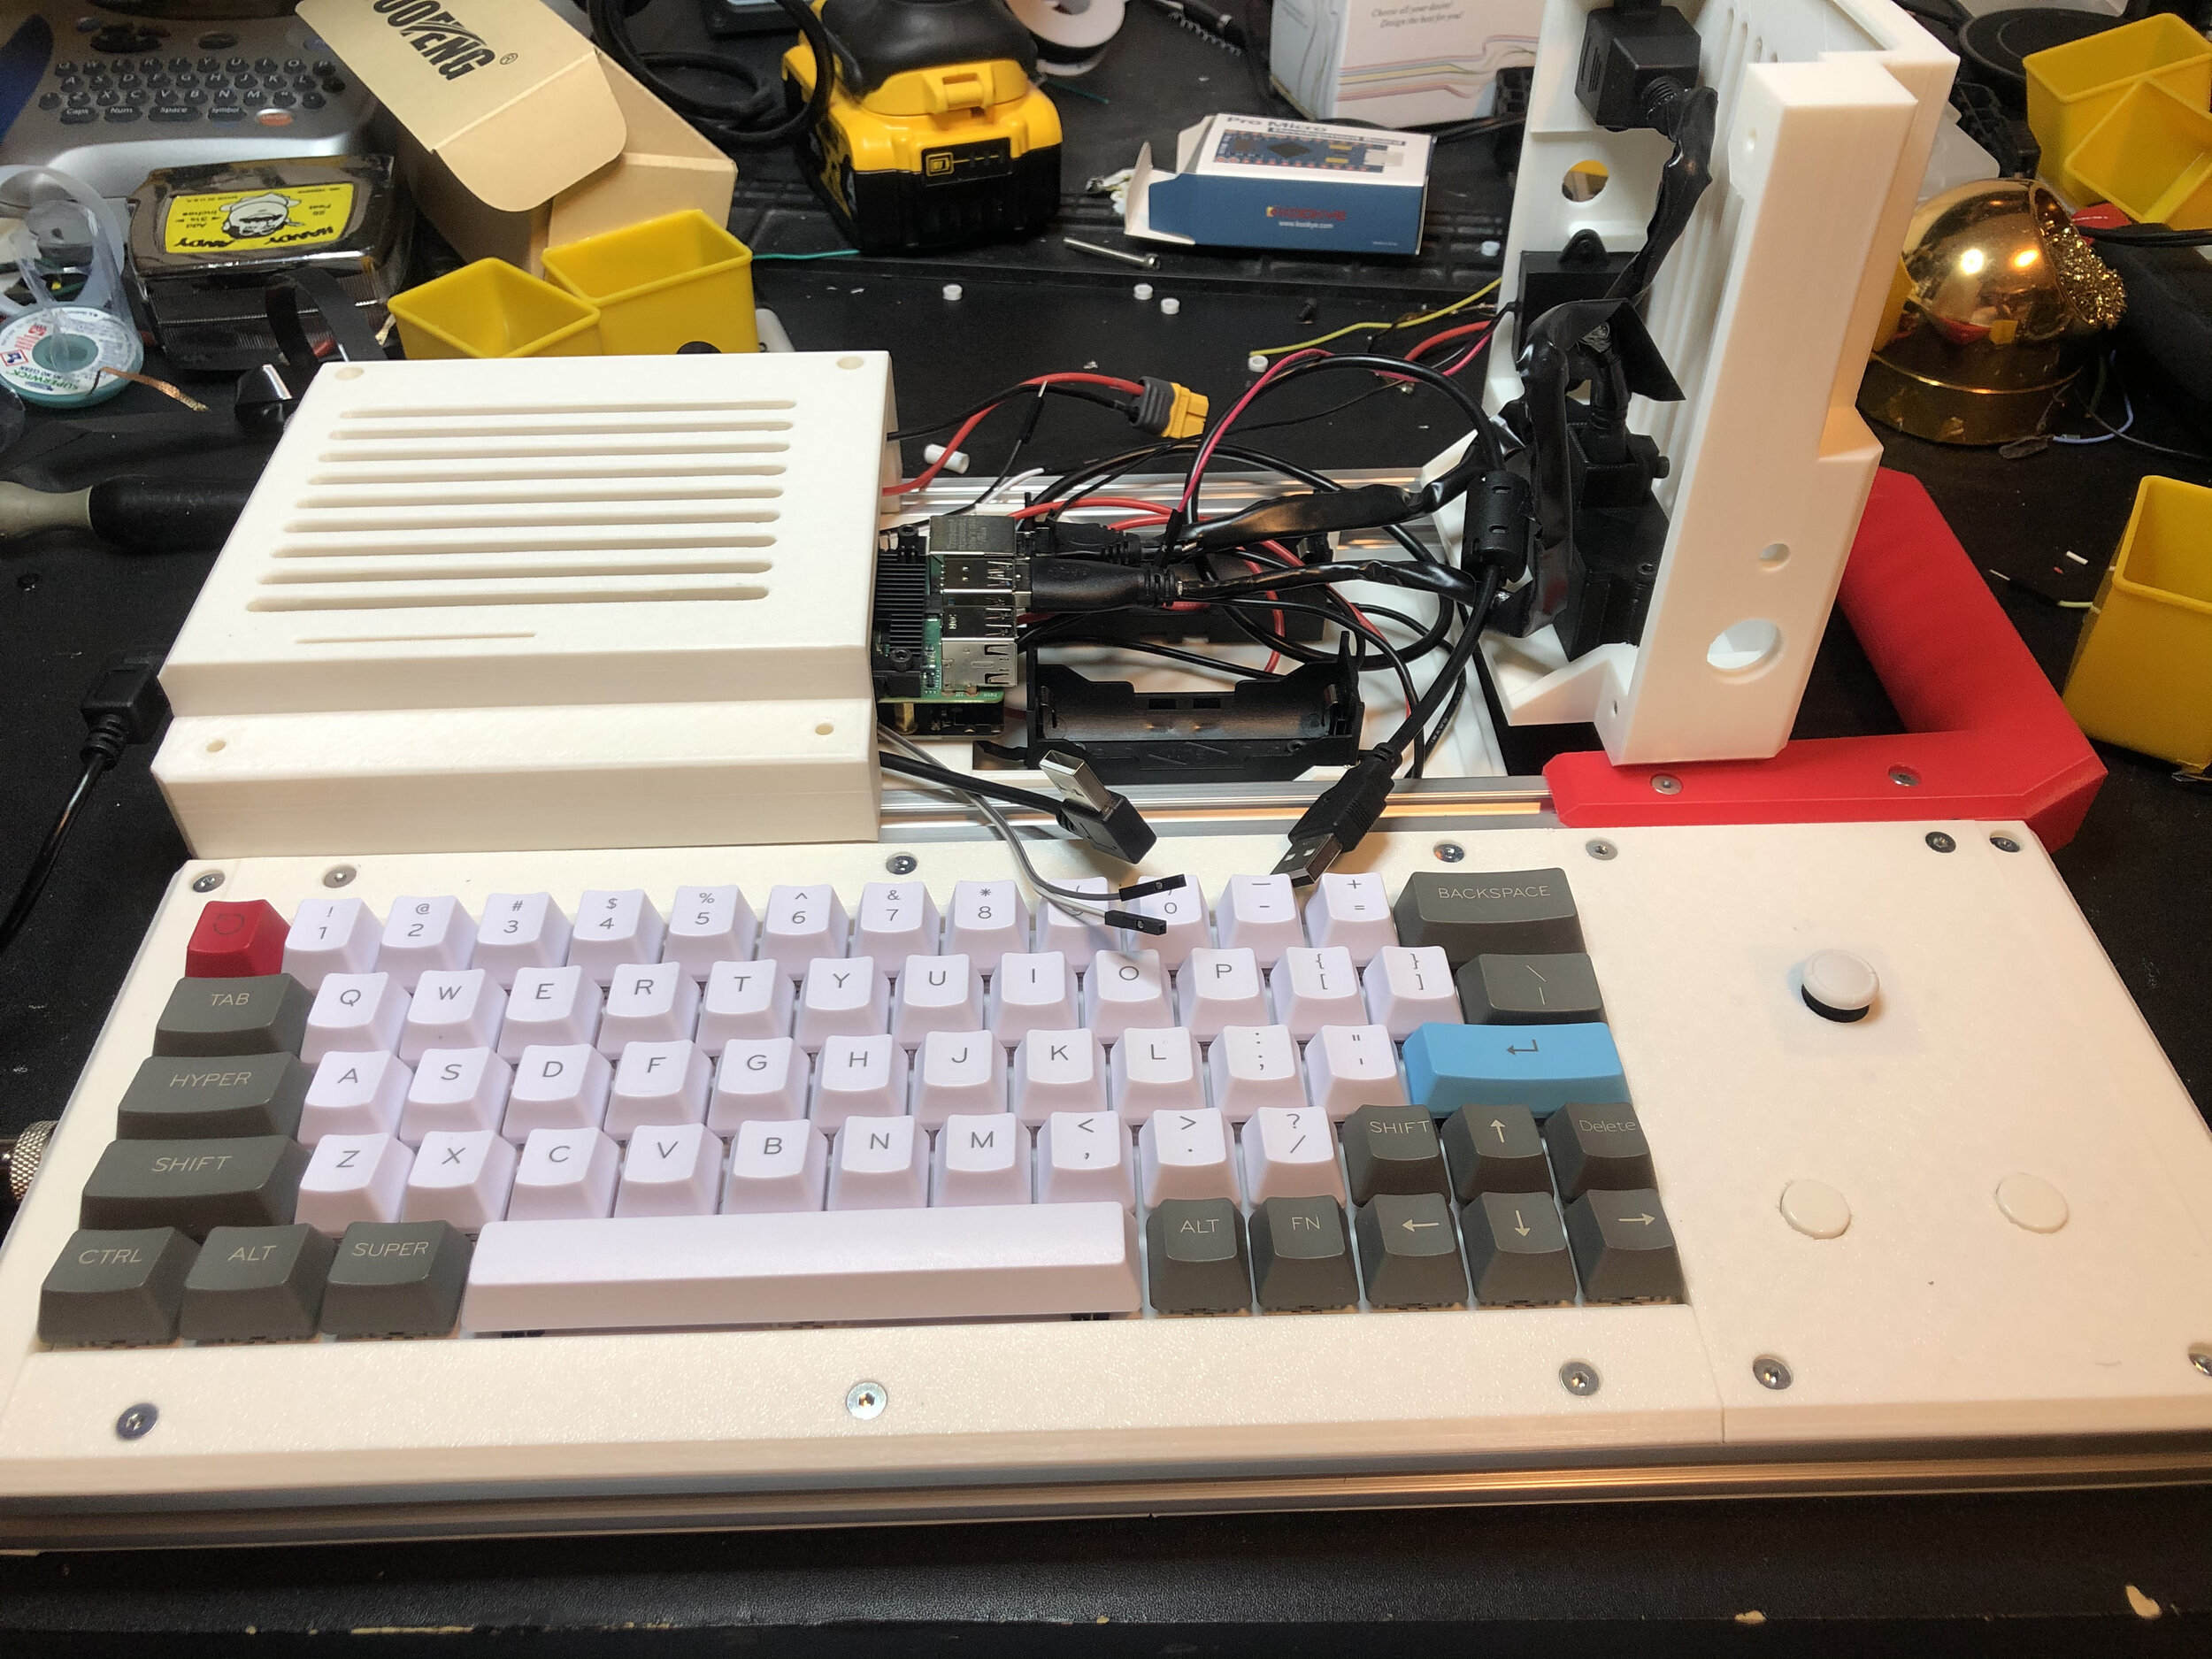
The name of this deck, M3TAL, came from the fact that there was so much metal used in the construction. Two pieces of 2020 aluminum extrusion, one pice of 2040 extrusion, and far more screws than I care to count. Needless to say M3TAL is very sturdy and robust machine. One could probable beat off a cyber ninja assassin with it. It even has a handle for a good sturdy grip!
I really learned a lot in this build, and it built upon what I learned with Yamato. My design skills in Fusion 360 have been sharpened and honed to a point that I feel pretty confident in my ability to design whatever I need for future decks. Speaking of, I already have several designs in the works including one for Yamato 2. I plan on releasing all of the design files (step and stl) for M3TAL soon, and I’m even going to be making a stand alone keyboard version of this build.

I would like to thank everyone who helped with this build, those who offered guidance, those who gave me a kick in the ass when it was needed and those who encouraged me along the way. 2020 was a hard year for many of us. Building M3TAL was a good distraction. In fact, one could say that 2020 is holding M3TAL together…. You know… 2020 extrusion…. I’ll see myself out.
BOM:
Printed parts
TWTADE/70pcs 4 Pin Tact Tactile Push Button
3D Replacement Joystick Analog, Thumb Stick for Nintendo Switch
Tendak USB Floppy Disk Drive - 3.5
Iverntech 2pcs 500mm T Type 2040 European Standard Anodized Aluminum Profile Extrusion
Sabrent 4 Port Portable USB 2.0 Hub
Audio Amplifier Board, DROK 5W+5W Mini Amplifier Board
Amass 10 Pair XT60H Bullet Connector Plug
Genuine Cherry Plate Mounted Stabilizers
YMDK Customized 61 64 68 ANSI Keyset OEM Profile Thick PBT Keycap Set
Aviation Plug Connector 10 Pairs
BCP 5PCS Black Color Plastic Single 26650 Battery Holder
(100 Pcs) McIgIcM 1N4148 Switching Diode
MakerHawk 2pcs Speaker 3 Watt 8 Ohm Single Cavity Mini Speaker
Forward Direction 40 Pin FFC FPC Ribbon Flat Cable 0.5mm x 300mm 5pcs
100pcs M4 T-Slot Hammer Head Nut
Ethernet Extension Cable 1ft RJ45 Male to Female Screw Panel Mount
Geekworm Rapberry Pi 4B/3B+/3B UPS HAT
Xiwai CYFPV 90 Degree Up Angled FPV Micro HDMI Male to HDMI Male Flat Cable
4 Pcs 2020 CNC 3D Printer Parts European Standard Anodized Linear Rail Aluminum Profile Extrusion
Gateron KS-9 RGB Mechanical MX Type Key Switch
KOOKYE 5PCS Nano V3.0 ATMEGA328P
MakerHawk 6pcs USB to DIP Adapter Converter
1.5M USB to Printer Adapter Cables 90 Degree USB 2.0 A Male to B Down Angle Plug